FN-BC04 Basics
A basic introduction to the FN-BC04
This
Now that we know the differences between the 2 versions of the boards. Let's get a little more information about what the module offers. Here are some of the key features that these powerful sound modules have to offer
-
Supports both MP3 and WAV file formats
-
Works on all systems (Windows, Mac, and Linux)
-
Has 4MB of memory on board ( about 4 minutes of high-quality sound files )
-
Supports up to a 32GB microSD for hours of high-quality sound files
-
When plugged into your computer, it will register as a USB for easy file transfer
-
Has 4 buttons to use to activate
-
Built-in 10 watt speaker amp to drive a powerful speaker
-
Equipped with a 3.5mm audio jack
-
Adjustable volume
-
Runs on a wide range of voltage ( 8-24 volt DC )
-
Small in size 52mm x 49mm x 14mm or about 1 15 16 in x 2 1 16 in x 9 16 in
Since we have some of the basics outlined, this will be a basic “How To” to get this module up and running in 10 minutes or less for the everyday user. This board is a unit that is sold by itself or as a kit that has everything that is needed to get the module up and running. Here is a link to that kit
-
The soundboard itself
-
Push buttons
-
Speaker
-
Battery box with battery clip for easy connecting or some form of power
Before we start with connecting everything up, let's put some sound files on the device when it is still easy to move without having to worry about tangling the wires all up. So for this, you will need the sound module itself, your computer, and a micro-B USB cable to connect the sound module to your computer. Here’s a link to one that we sell:
Here is a screenshot of what it will look like on your computer if it was detected properly.
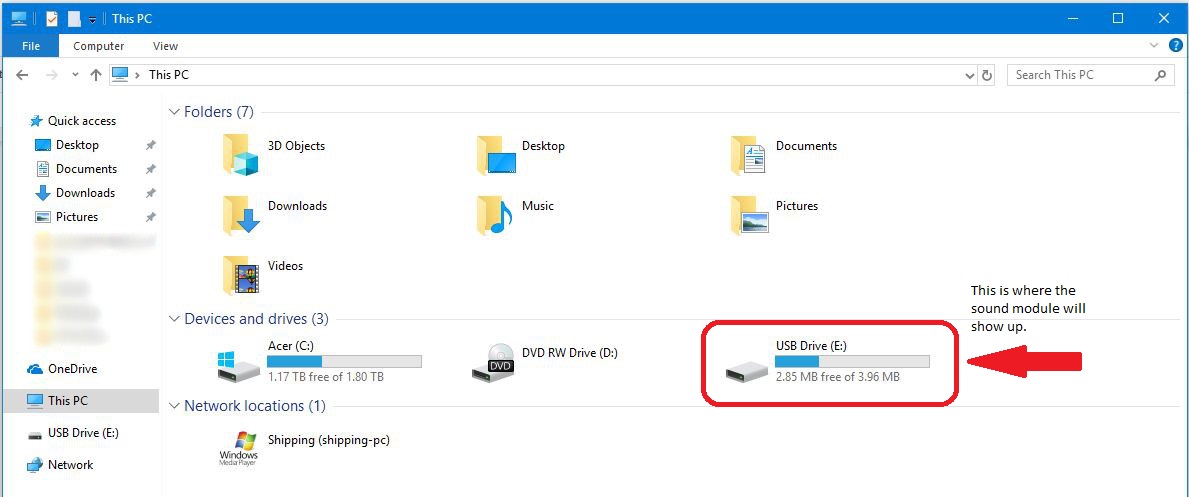
Once the sound module shows there, we can click and open it up. It should appear to look like this or very similar in most cases.
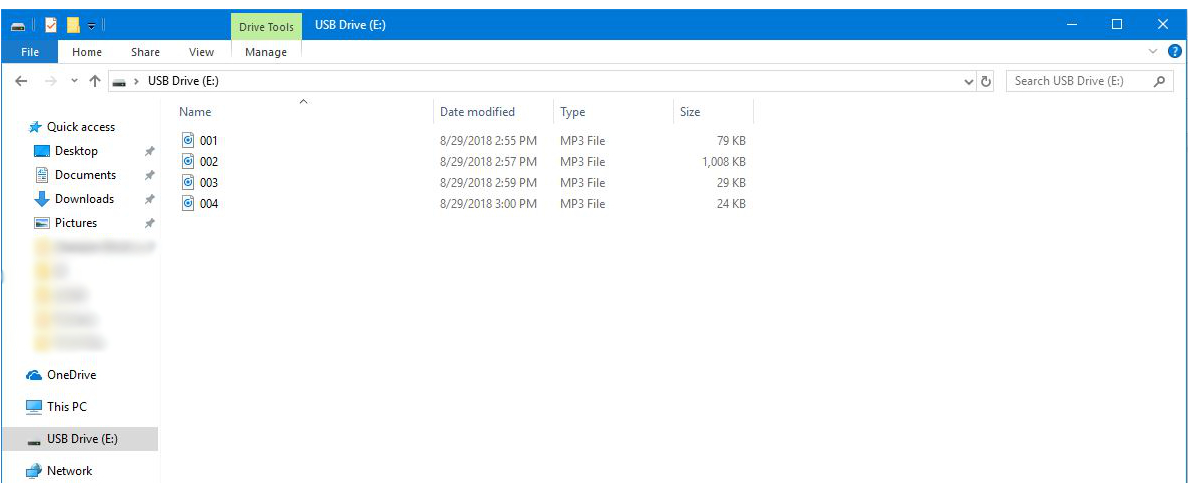
Once you get to this point, this is where you can remove the default sound files that come on the sound module from the factory. It is as simple as selecting the files and clicking Delete. Once those files are removed, you can put your own sounds onto the device. When naming your sound files, make sure that they are named in correlation to what button you wish them to be played on. Such as for button 1 you would name the sound file “001” and for button 2 you would name the sound file “002”. So on and so forth. This will go on until you name all of the sound files that you wish to put onto the device up to 4 sound files. To put these sounds onto the device, it is as simple as dragging and dropping the files.
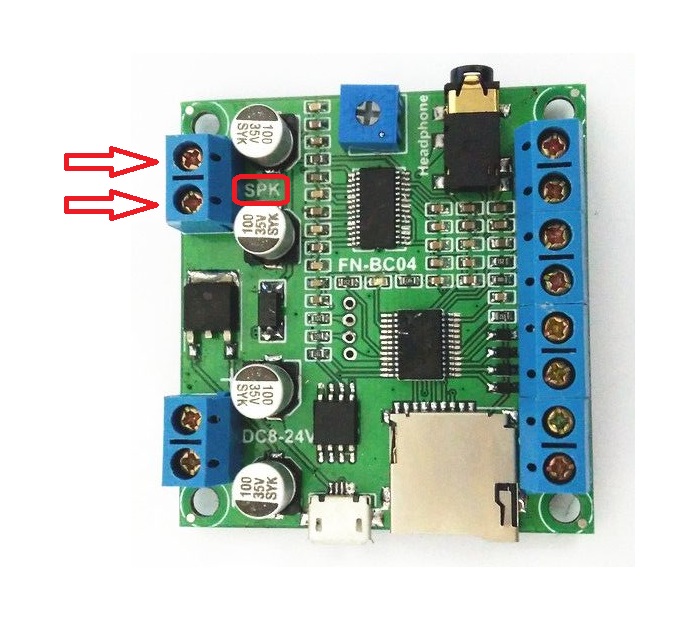
Now that we have the sounds on the sound module you can now attach all the peripherals to the device. Let’s start with attaching the speaker to the sound module. This is very simple to do. On the sound module, you will see a set of terminal blocks that are labeled SPK. Please refer to the image below to see where the speaker connects. Use a small screwdriver to loosen the terminal blocks enough to insert the speaker wire. Once it has been inserted. Use the small screwdriver again to then tighten the screws back down.
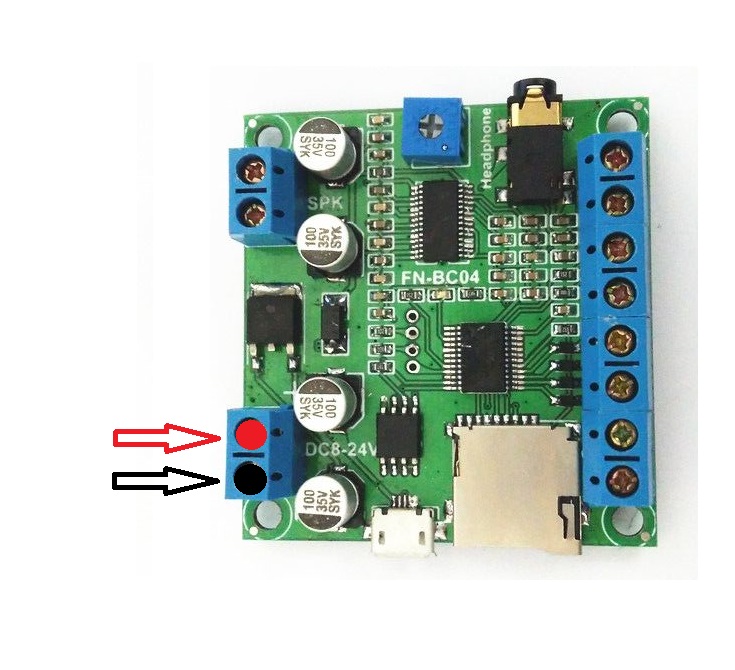
Now that we have to speaker attached, let’s attach the power. You will use the same method to attach the power as you did with the speaker. With the terminal blocks lose. You will attach the power to the correct terminals. It is very important to connect them to the right terminal. There is a positive terminal and a negative terminal. The positive terminal will get the red wire on your power pack and the negative terminal will get the black wire. The image below will show which terminal blocks are the power ones and which ones are positive and negative.
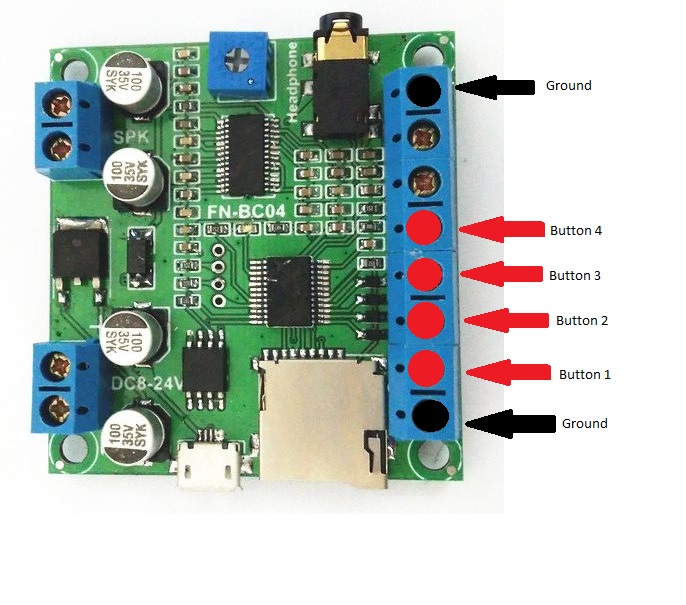
Nice, now that we have the speaker and power hooked up to the board, we have to add the buttons. This will be fairly straightforward with how you loosen the terminal blocks to allow the buttons to be inserted then tighten them back down to make sure that they are making good metal on metal connection. Please refer to the image below to see which terminal block is which button. Please note that one lead of the button must go to the ground that I have marked as black in the image below and the other
Congratulations! You have put together your first sound module from Electronics123.com. Now it’s time to test all of the buttons that you have installed and add some custom sounds to your project to take it to the next level. This is just the basics of this board in the next one, I will go over some of the more advanced features. If you have any questions, feel free to contact at any time at [email protected] Have a nice day!